Showing posts with label crochet. Show all posts

Wednesday, January 28, 2015

Hippity Hoppity Hippo Hat

This was a fun hat to make. I must say, I did stick to the directions way more than I normally do. For my Hippity Hoppity Hippo Hat,  I started by using the Hippo Hat Pattern from Repeat Crafter Me. Then got all funky and changed things, adding taking away, adjusting. Since it is a baby hat... no buttons allowed for me!

I'm sure you are more interested in my adaptations than my long winded fluff, so here you go!

Stitches/ Abbreviations:

AC - Accent Color
CH - Chain
EC1- Eye Color 1
EC2 - Eye Color 2
MC - Main Color
SC - Single Crochet
SCD - Single Crochet Decrease
SS - Slip stitch
ST(s) - Stitch(es)

Yarn:

MC - 2 strands of blue "Loops & Threads® Woolike™ Yarn" from Michael's  
AC - 2 strands of green "Loops & Threads® Woolike™ Yarn" from Michael's
EC1 - 2 strands of black "Loops & Threads® Woolike™ Yarn" from Michael's.
EC2 - 2 strands of white "Loops & Threads® Woolike™ Yarn" from Michael's,

I start by using the MC and following the instructions for Size: 9-12 Months (Should fit up to about 16). I complete all 13 rows as outlined without deviation.

My Ear Flap Variation:

Still using the MC I work my way in to my style of  ear flap.
Row 1 - CH 1, SC in next 10 STs, CH 1, turn
Row 2-  SCD, SC in next 6 STs, SCD, CH 1, turn
Row 3 - SCD, SC in next 4 STs, SCD, CH 1, turn
Row 4 - SCD, SC in next 2 STs, SCD, CH 1, turn
Row 5 - Make 2  SCD, CH 1, turn
Row 6 - SCD, CH 30 and fasten off with a tail of yarn form the end of the chain.

Follow the instructions for Hippo Hat Pattern from Repeat Crafter Me for placement of the other Ear flap, but repeat the instructions above leaving a 30 CH tail on the other ear flap.

Hat edging and braided tie:

In the AC.
*CH 30 with a long lead string off the first ST of the CH.SS in the last SCD of the ear flap. SC across front of hat down other ear flap, SS in last SCD of other ear flap, CH 30 fasten off with a tail of yarn hanging form the end. * Repeat for the back of the hat.
Braid together the 3 CHs and Knot the three tails together when the brain runs out of chain,

Outer Ear:

I made my outer ear according to the ear instructions in the Hippo Hat Pattern 

Inner ear:

Using the AC. 
CH 4
HDC in the 2nd CH ST from hook.
SC in last CH ST
CH 1, turn
SC in SC and in next HDC
2 SC in each ST at top of ear.
SC in ST coming down the other side of ear.
SS bottom of ear together.

Sew into outer ear.

White of eye: 

Use EC2.
I made my white eye according to the instructions in the Hippo Hat Pattern, but

Center of Eye: 'Cause I did not want to use a button.

Using EC1.
Magic ring (from instructions)
4 SC in ring,
Pull ring closed.
SS in first SC.

Sew to the white of the eye.


Hippo Hat Eyes and ears Shot
Hippo Eyes & Ears

Teeth:

I made my teeth according to the instructions in the Hippo Hat Pattern.


Hippo Hat Teeth shot
Hippo Teeth & Snout

 Hippo Snout: 

Using the AC. 
I started by following the instruction in the Hippo Hat Pattern.
The pattern ends just below the nose holes Start by going down away form the nostril.
SC all the way around the lower snout.
Separate out the nostril by placing 3 SCs in the CH that creates the hole.
SC across the top.
Separate out the other nostril by placing 3 SCs in the CH that creates the hole.
SS to first SC of round.
CH 1, Turn.
SC in each SC of nostrils and top of snout.

This is again because I didn't want to use a buttons. 

Snout placement. Sew down the main snout leaving the nostril tops free.

Stitching down the nostril, separate it from the snout to allow the base hat color (MC) to show through. Stitch down between the first and second SC on the snout to allow the nostrils to flair.


Voila One Hip-pity Hop-pity Hippo Hat. 


Hippo Hat- Front Shot
Hippo Hat- Front
Hippo Hat- Side Shot
Hippo Hat - Side


Tuesday, January 27, 2015

Raspberry Days of Winter ?!?

Raspberries are my favorite fruit. There is just something,  so good about going out an picking the sun warmed fruit of the bush and eating them before you even get back inside.

On craving days like to day I really miss my Grandma. She passed away back in 2004. She lived her life in a house that my Grandfather build. He was a carpenter. In her backyard was a beautiful large flower garden  (at lease 4 feet by 12 feet- probably more), Behind there when I was young was a huge vegetable garden (I'm guessing a minimum of 20 ft by 12 ft- again probably more). The place I loved most were the two to three rows of raspberry bushes running the long length of the vegetable garden.

I remember on summer days Grandma would send us outside to find ripe raspberries with a bowl or a bucket. I know more of the berries wound up in my stomach than in the collection to go inside to be made into jam, and for dessert like in a fresh raspberry pie or onto ice cream.

Are your expecting me to share one of those time loved recipes for my Grandma's raspberry something?  Well I will cover the recipe for a raspberry something. It is not Grandma's recipe, but you can make it anytime of the year with some red and green yarn.

The following are directions to create a raspberry hat. I started out with instructions from Olivia from Hopeful Honey called Raspberry Baby Hat Crochet Pattern. In truth, I found the instructions hard to understand and follow.  I also found that the "Puff Stitch" wasn't very puffy, nor was it explained in the instructions. I  did find the instructions for a "Puff Stitch" posted by a Julia from FaveCrafts in response to a reader who asked how to do the stitch. It was "berried" at the bottom of the screen. 

 I can't leave anything alone and changes abound from the original instruction I was using.  I wrote out my pattern, and I am naming it in honor of my Grandma. 


Theresa's Raspberry Hat Crochet Pattern


Materials:

Crochet Hook: H/8 or 5 mm  

Yarn:  MC= "Franken yarn" - close to a light/medium weight yarn (bulk 3). My franken yarn was 2 strands of red "Loops & Threads® Woolike™ Yarn" from Michael's and 1 strand pink variegated Aunt Lydia’s Crochet Cotton Classic 10
AC= 2 strands of green "Loops & Threads® Woolike™ Yarn" from Michael's  

Scissors

Tapestry/ Yarn needle


Stitches and Abbreviations: 

CH - chain
BL - back loop
DC - Double Crochet
HDC - Half Double Crochet 
SC - Single Crochet 
SK - Skip
SS - slip stitch 
ST(s) - Stitch(s) 
TC - Treble Crochet 
YO - Yarn Over
* - section to repeat. 


Specialty Stitches Abbreviations and Instructions:


Magic Ring - Magic Ring Tutorial

PS - Puff Stitch: *YO, insert hook in ST, YO, bring a loop through the ST, YO, bring loop through 2 loops on hook* repeat 3 more time. YO, draw loop through 4 loops on hook, YO, draw through 2 loops on hook.


LPS - Large Puff Stitch: *YO, insert hook in ST, YO, bring a loop through the ST, YO, bring loop through 2 loops on hook* repeat 4 more time. YO, draw loop through 5 loops on hook, YO, draw through 2 loops on hook.


Pattern Instructions:

Hat:

Using MC yarn. 
Magic Ring
Row 1 - *DC in the ring, CH1* (repeat 5 more times), SS to first DC, CH 2. (row has 12 STs)
Row 2  - PS in every ST of row 1, SS in first PS, CH 2. (row has 12 PS)
Row 3 - *2 PS in PS of row 2, PS in next PS of row 2* Repeat all the way around, SS in first PS, CH 2. (row has 18 STs)
Row 4 - *2 PS in PS of row 3, PS in next two STs of row 3* Repeat all the way around, SS in first PS, CH 2. (row has 24 STs)
Row 5 -  *2 PS in PS of row 3, PS in next six STs of row 3* Repeat all the way around, SS in first PS, CH 2. (row has 27 STs)
Row 6 - *PS in fist ST, LPS in next ST* Repeat all the way around, SS in first PS, CH 2. 
Row 7 - *LPS in fist ST, PS in next ST* Repeat all the way around, SS in first PS, CH 2.
Row 8 - Repeat row 6
Row 9- Repeat row 7
Row 10-  *PS in fist ST, LPS in next ST* Repeat all the way around, SS in first PS, CH 1. 
Row 11-  SC in each ST, SS in first SC.
Fasten off and weave in ends.


Stem:

Using AC yarn. 
Magic Ring
Row 1 - SC 5 times, SS in first SC, CH 1
Row 2 to 5 - SC into each ST, SS in first SC, CH 1
Row 6 - Decrease stitch through all ST, fasten off.


Leaves (make 6):

Using AC yarn. 

CH 9.
Side 1 (One side of foundation CH) - SC in 2nd CH, HDC in next ST, DC in next ST, TC in next two STs, DC in next ST, 2 HDC in last CH ST. CH 2.
Side 2 (Other side of foundation CH) - 2 HDC in first ST, HDC in next ST, DC in next St, TC in next two STs, DC in next ST, 2 HDC in last CH ST, SS to fist SC on Side 1.
Fasten off with extra long tail. Weave Up the center or the leave to the opposite end which is the end by the stem.


Creating the berry hat top:

Step 1: Using the extra yarn and yarn needle sew the leaves together in the BL half way down to create a circle, the yellow lines in this image shows where it was sewn.
Step 1- Sew leaves in a circle.
Step 2: Sew the stem in the center using some green yarn that matched the leaves n stem. 
I did this by running a stitch for leaf to opposite leaf, each stitch represented by a different color in the image.  Pulling each stitch tight the leaves will want to fold up towards the stem into a flower. This is not a problem.
Step 2- Add the Stem
Step 3: Sew the full green top to the hat. Centering the stem over the hat's center an the leaves over row 1 of DCs.  I stitched down the center of the leaves about 3/4 of the way, then back to the stem then down the next leaf back to the stem, all the way around.  I allowed the tips of the leaves to stick up/out for a realistic look. The green dashes in the image represent the stitch route. 


Step 3- Sew to the Hat


Berry-licious!!!

Here is my finished hat.


Raspberry Hat sideview
Theresa's Raspberry Hat- Side View


Raspberry Hat topview
Theresa's Raspberry Hat- Top View

I have already been asked to make this for an adult friend. I told them it will have to be a blackberry, boysenberry, or maybe a yellow raspberry. 

Sunday, January 25, 2015

The Humans are Dead Robot Hat for the year 2000.


This hat started with me singing The Humans are Dead....  as soon as I found the pattern for a Robot hat on Repeat Crafter Me. Do you know the song "Robots" by Flight of the Conchords, referred to as The Humans are Dead by everyone I know.  I suggest you listening to it over and over and over, and over again.

As I was working on my hat, I had all of the versions available on YouTube playing. Here is the best version combining Doctor Who and the Flight of the Conchords' Robot song... as the title says AWESOME!


Enjoy the video while I explain how I created my hat and what I changed.

Again I was making this for a baby, so I banished the button in the original instructions.
I also adjusted this to be for only 3 yarns.

Stitches/ Abbreviations:

AC - Accent Color
CH - Chain
MC - Main Color
SC - Single Crochet
SCD - Single Crochet Decrease
SS - Slip stitch
ST(s) - Stitch(es)
WY - White Yarn

Yarns: 


MC - 1 skein Patons Metallic Yarn in Pewter
AC - 1 skein Patons Metallic Yarn in Gold (looks more brass/coppery to me)
WY - Some white yarn - I used "Loops & Threads® Woolike™ Yarn" from Michael's.

Square Hat:

Using the MC.
I followed the instructions in the  Robot hat on Repeat Crafter Me to create my square hat for Size 9 to 16 Months.

My Ear Flap Variation:

Still using the MC I work my way in to my style of  ear flap.
Row 1 - CH 1, SC in next 10 STs, CH 1, turn
Row 2-  SCD, SC in next 6 STs, SCD, CH 1, turn
Row 3 - SCD, SC in next 4 STs, SCD, CH 1, turn
Row 4 - SCD, SC in next 2 STs, SCD, CH 1, turn
Row 5 - Make 2  SCD, CH 1, turn
Row 6 - SCD, CH 30 and fasten off with a tail of yarn form the end of the chain.

Follow the instructions for Robot hat on Repeat Crafter Me  to properly place the other Ear flap. However I used my variation to when creating the actual ear flap.

Hat edging and braided tie:

In the AC.
*CH 30 with a long lead string off the first ST of the CH.SS in the last SCD of the ear flap. SC across front of hat down other ear flap, SS in last SCD of other ear flap, CH 30 fasten off with a tail of yarn hanging form the end. * Repeat for the back of the hat.
Braid together the 3 CHs
Knot the three tails together when the brain runs out of chain.

Robot Ears: 

 I followed the instructions from Robot hat on Repeat Crafter Me.
My variation was for the colors:
Magic Ring & Row 1  - AC
Rows 2 through 7 - MC
Rows 8 & 9 - AC

I fluffed out my ears to be more spherical, and sewed them on that way.  

Robot Top: 

I followed the instructions from Robot hat on Repeat Crafter Me.
My variation was with colors:
Magic Ring & Row 1  - AC
Rows 2 through 5 - MC
Rows 6 through 12 - AC

I stuffed my top to make it stay round. Using some old Homespun yarn that was fraying apart as poly fill, it worked out pretty well.  

Robot Eyes: 

I followed the instructions from Robot hat on Repeat Crafter Me.
My variation was for the colors:
Magic Ring & Row 1  - MC
Row 2 - WY
Row 3 - AC

Robot Mouth: 

I followed the instructions from Robot hat on Repeat Crafter Me.
My variation was in the color. I used the AC, so create the mouth.

 The Humans are Dead Robot Hat for the year 2000


Saturday, January 24, 2015

Cupcake Confection.... Zero Calories

The day start with me starting on a new hat on my bus ride into work.  To be honest I got distracted by the sky out the window. I mean really would you be able to ignore this?


And then it  moved into this,,,


 I mean WOW! what a morning to be awake.

Once I got into my work building, I just felt that sense of inner calm the day was going to be totally AWESOME. I was right. During my lunch and work breaks I use up some leftover miscellaneous yarns to create the top of the Repeat Crafter Me Cupcake Hat (0-3 month).

I have found over time, I usually cannot follow any recipe without adding my own spice, flavor or flair. Well since this is a cupcake, that is exactly what happened to my version of the Repeat Crafter Me Cupcake Hat .

I followed the instructions for rows one through eight, but this is where my frosting top ended.
My creation was this interesting blue with white speckled frosting top, which looked great (I need to work on taking more photos of my work in progress!).

I got home from work and dug through my yarn collection. I found this super soft microfiber yarn in a hot pink/ pinkish red. It had to be the morning sky that inspired me to even try this color as the cupcake wrapper.

Since my top ended at row eight, I had to do a little pattern rework to find a new place to attach the cupcake wrapper, but still allow for the cute frosting overhang (without scallops).

Here is what I did...

I followed the instructions for "Round 11", but instead attached it to "Round 6" on the inside as the instructions show. I then I followed the instructions for "Round 12-14". Instead of ending after three rows like the instructions say, I added an additional three rows to compensate for attaching at row 6 instead of at "Round 9" as in the original instructions. This allowed for the hat to be just as tall as the original instructions.

The ear-flaps I did some modifications as well.

I followed the instructions for rows 1, 2, 4, 6,  and 8. For row nine I did one single crochet decreased, and then chained 12 to create a tie string. fastening off in the last chain and leaving a long string hanging... the size of the sting was more for an adults BIG fingers than for the child.

For the place meant of the second ear-flap I counted over ten stitched from the first stitch of the first ear-flap on the back of the hat. Then I worked from back to front, following the instructions for "Earflap 1"  rows 1, 2, 4, 6,  and 8. and to finish I did the same as above for row nine.

If you thought the tweaks above was flair.... nope. That was just interchanging some spices, like cardamom for cinnamon which I do 80% of the time with recipes.

Here is where I really deviate from tthe Repeat Crafter Me Cupcake Hat .

I just didn't like the look of the cherry on top of the cupcake, it made me think ice cream instead of cupcake.

After some brainstorming and day-dreaming of cupcakes.... Mmmmmmm, Cupcakes!

I remembered many stores use a really big starburst tip, twisting the frosting to create almost a spiral.

Back to digging in my yarn collection looking for that perfect "frosting" color yarn to create a perfect cupcake confection's spiral. I came up with some left over homespun greenish-blue, and light pink specked.

Mmmmmmm, Cupcakes!

I added the greenish-blue (g-b) first working my way around (starting from the back) single crocheting attaching periodically to the hat a stitch here and there. Since the yarn was so thick it was about every  3 to 4 stitches. around in a circle spiraling to the center.

After the first spiral was placed, I added the pink starting in the front to one side to allow for some blue and white of the original "frosting" to show through.  Again I attached ever 3 to 4 stitches spiraling to the center.

At the top middle, I created an alternating chain of color. I stitched 2 g-b stitches then 2 pink, 2 g-b, 2 pink. I  tied off the chain with two tail sticking out (one of g-b and one of pink).

I twisted the chain to finish the spiral on top creating that "frosting" top look.

To secure the chain, I uses some leftover yarn and a tapestry needle to sew the twist in place keeping the two yarn "frosting" sprouts in the center to stick up. I fasten off the yarn, used to sew the swirl in place, and weave in any extra to hide the tails.


Cupcake confection perfection!

Cupcake Hat - Front View
Front view
Cupcake Hat - Side View
Front-side view


Friday, January 23, 2015

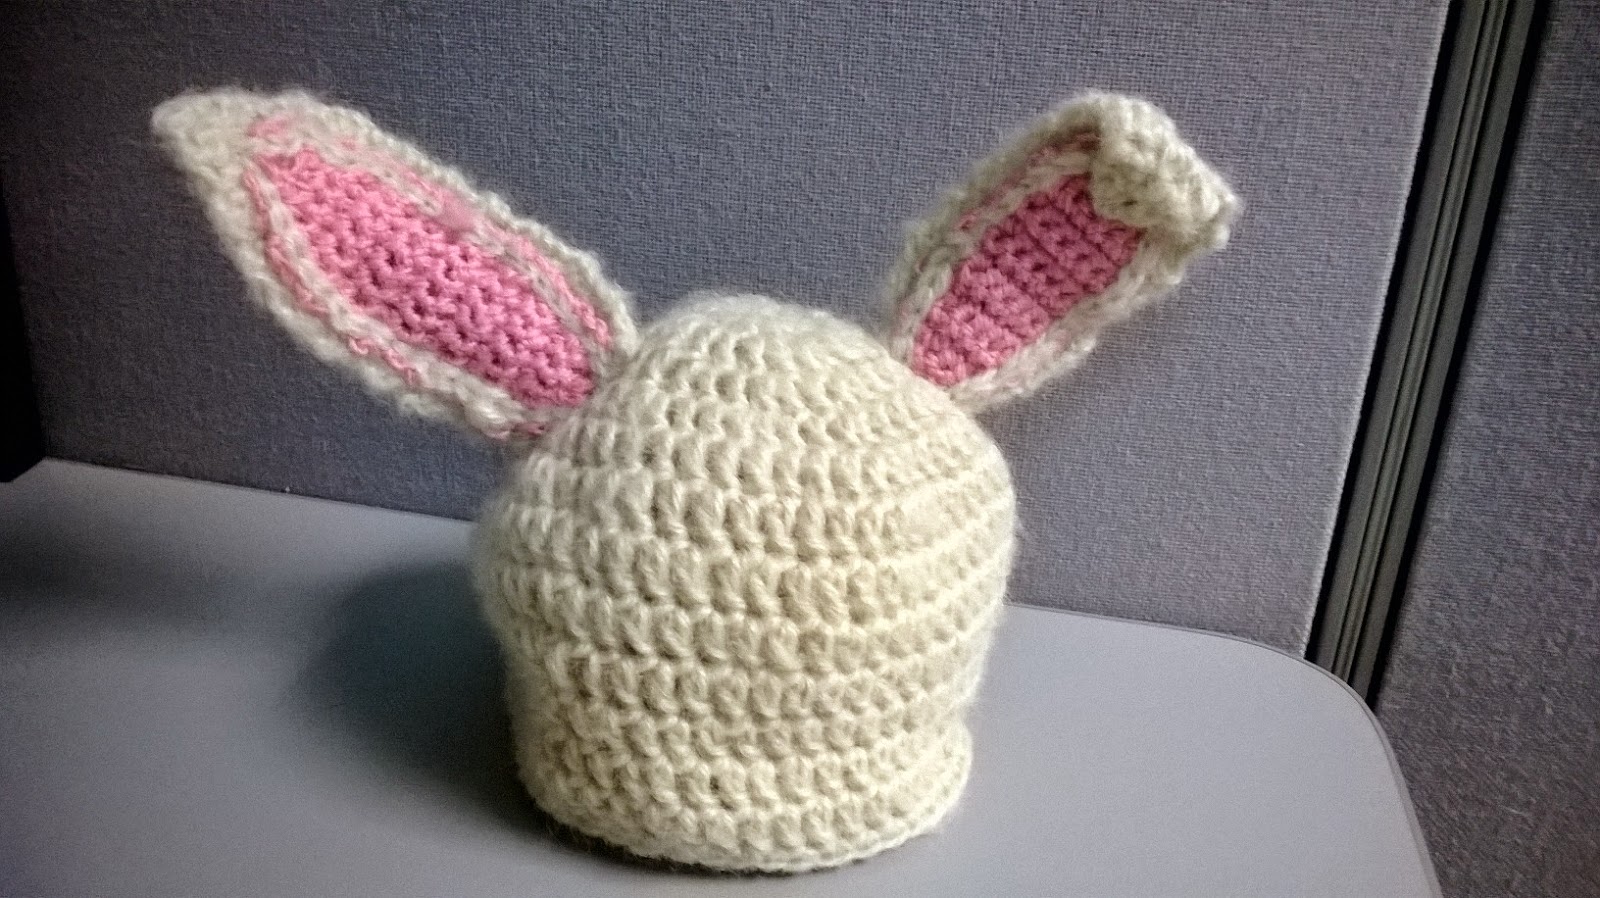
Bunny is really Le Petit Lapin?


On my bus ride to work I busted out the bunnies inner ears. On my work breaks I managed to attach the ears together, and at lunch bunny was pieced together. (Just in case you missed it this was the Repeat Crafter Me Bunny Hat pattern.)

The bunny lives, but I think he is French. 

I know you have been waiting patiently for the grand reveal, and instead of pulling a rabbit out of a hat I have a Bunny Hat….. Ta da!


Ok kind of anti-climactic, but I had to share with all of you dying to see the finished hat. 

Did I mention I think the bunny may be French? You laugh, but I’m right. 

I didn’t have time to work on a different hat on day four. My excuse this time is I promised my sister to go to belly dancing class (I hurt in places I forgot I had!). Well to my surprise when I got home from dance, I found my crock pot full of French Onion soup. We just finished my first batch of the French Onion soup, so I had to laugh. I can only deduce that it was the bunny’s doing since no one else was home, therefor he must be French. Cotton white tail, I mean caught by the tail, Le Petit Lapin!

Since I’m slacking on the hat creation front, I thought I would at least share my French Onion Crock Pot Soup recipe. I tweaked, twisted and combined to create this recipe over a week ago. It was a huge success with family and friends. 

 ENJOY, and let me know what comments you receive on the creation. 

French Onion Crock Pot Soup

Ingredients (Part 1 – Onions, Onions and More Onions):

·         5 Large Yellow Onions sliced thinly, or into bit size pieces
·         3 Tbsp. Olive oil, & 1 Tbsp. Coffee Rich  creamer (non-dairy w/o casein)
o   OR substitute 4 Tbsp. butter, for an authentic French flavor
·         3 Tbsp. white sugar (May not be need if you use sweet onions to start)

Directions (Part 1 – Onions, Onions and More Onions):

Place these in the Crock Pot (7 to 8 quart) on HIGH for 2 ½ hours. Stir periodically about every 15-20 min. This is to sweat the bitterness out and create translucence in the onion.
This may also be done on the stove top in a large skillet/pan to save time, but I didn’t want to dirty another dish to clean.

Ingredients (Part 2 – Better add broth for a soup):

·         8 cups Beef Broth (Substitute vegetable broth for a vegetarian version)
·         ½ tsp sea salt (double amount if using regular table salt)
·         1 tsp Thyme, ground (I had French on hand but I’m sure any will work)
·         2 tsp Worcestershire Sauce*

Directions (Part 2 – Better add broth for a soup):

Add to Crock Pot, turn to LOW for 8 hours or continue on HIGH for 4 more hours.

Ingredients (Part 3 – French Flourish to Finish):

·         Swiss cheese, sliced (or I guess you could use Gouda)
·         Onion & Sage stuffing cubes (we used Brownberry, or your could use croutons)

Directions (Part 3 – French Flourish to Finish):

Place cheese slice in the bottom of the bowl, ladle hot soup over the top, add a small handful of stuffing on top to cover.  Enjoy.

Other notes:

If you are like us, the rest will store nicely in the fridge, reheat on the stove or the microwave.
 If you opt to nuke it, place the cheese on top just after the soup is reheated to melt the cheese, stir, and add stuffing.
 If you reheat with the stove top, follow  Part 3 – French Flourish to Finish directions to serve.

* Worcestershire Sauce We couldn’t find one in the stores without monosodium glutamate (MSG), so I took multiple different recipes from all over the internet and created my own vegetarian version. I store my sauce in a small 3 oz. jar in the fridge. I put all my ingredients directly in the storage jar (adjusting to taste). Here are the ingredients: 1 Tbsp. lime juice (I used the from concentrate in a squeeze bottle, but I’m sure fresh would be better), 1 Tbsp. Garlic Powder, 1 Tbsp. Molasses, 1 to 2 Tbsp. low sodium soy sauce (I first added one with everything else then tasted and found it needed two to be correct for me), 1 Tbsp. Rice vinegar (I’m sure any vinegar will work if mild colored- apple/ white/ malt), 1 tsp onion powder, 3 drops Frank’s Red Hot Original Sauce (any hot sauce would work I’m sure), and a pinch of sugar. Shake vigorously to mix, taste end product and adjust to taste but remember it is supposed to be Worcestershire Saucy.